Zero Knee & Joint Pain Hiking Guide: Uphill vs Downhill Kinesiology Taping & Self-Care Formulas
- 1Analyzes the biomechanical difference between uphill muscle exertion (fatigue/cramps) and downhill joint impact (patellar tendonitis/IT band syndrome).
- 2Provides step-by-step kinesiology taping methods for patellar locking, IT band friction reduction, and figure-8 ankle stabilization in under 5 minutes.
- 3Features 3 on-the-trail 30-second joint reset stretches without taking off your heavy backpack.
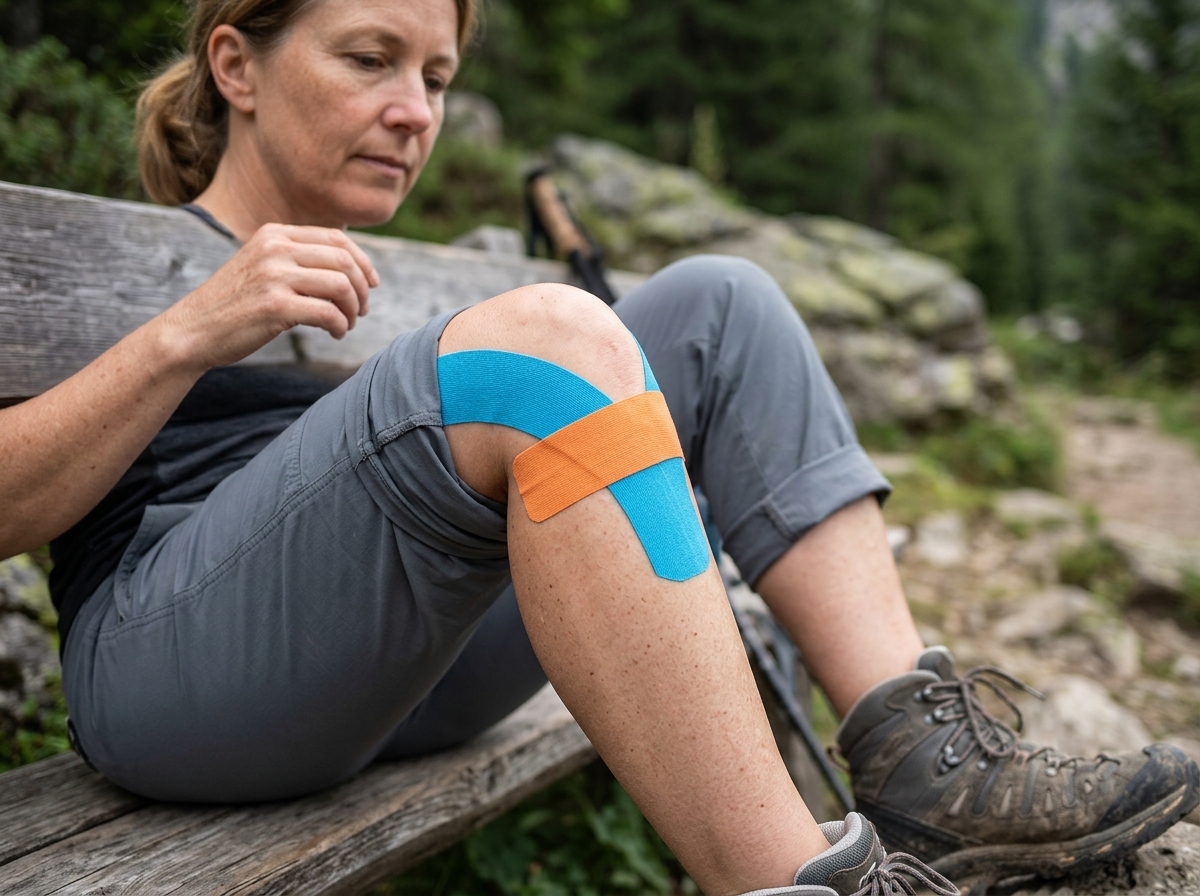
Real Photo Step-by-Step Taping Visual Guide
⚠️ Symptoms:Sharp or throbbing pain right below the kneecap with every downhill step
👉 Sit on a chair or rock with your knee bent naturally at a 90° to 120° angle
Step-by-Step Application Protocol
2 Steps CompleteAnchor the base of the Y-tape 5cm below the kneecap with 0% tension. Wrap both split arms around the circular contours of the kneecap upward.
Stretch the middle 5cm firmly (60-70% tension) across the tender patellar tendon right below the kneecap. Lay the final 2cm ends with 0% tension.
1. [Comparison Matrix] Uphill 3 Pains vs Downhill 3 Pains
| Type | Primary Pain Location | Biomechanical Cause | Symptom Characteristics | Tailored Taping Solution |
|---|---|---|---|---|
| Uphill 1 | Upper Knee / Quadriceps | Excessive concentric contraction & lactic acid | Burning sensation in thighs and heavy legs | I-Tape Quadriceps Up-Lifting (20-30% tension) |
| Uphill 2 | Calf / Achilles Tendon | Overloaded gastrocnemius during push-off | Calf cramping and tight achilles | Y-Tape Calf-Achilles Dispersion Taping |
| Uphill 3 | Plantar Fascia (Arch) | Arch collapse on rocky inclines | Aching center of foot and heat sensation | X-Tape Plantar Fascia Tension Support |
| Downhill 1 | Lower Front Knee (Patella) | Landing shock directly hitting patellar tendon | Sharp stabbing ache right below knee cap | Y-Tape Patella Lock + I-Tape Horizontal Decompression |
| Downhill 2 | Outer Knee (IT Band) | Repetitive friction against lateral epicondyle | Needle-prick sharp pain on outside of knee | Vertical I-Tape + Cross Decompression |
| Downhill 3 | Outer Ankle / Malleolus | Overstretching of lateral ligaments on scree | Ankle instability and rolling sensation | Figure-8 Ankle Anchor Lock |
2. 🔼 [Uphill Dedicated] Causes & Self-Taping Prescriptions
- Quadriceps Fatigue Relief: Bend knee 90 degrees, place anchor (0% tension) above patella, and apply 20-30% tension upward toward hip.
- Calf Cramp & Achilles Defense: Flex ankle toward body, anchor at base of heel, split Y-arms around calf muscles to enhance pumping action.
- Plantar Arch Spring Reinforcement: Cross two I-tapes in an 'X' pattern across foot arch from heel to toe bases to prevent arch fatigue.
3. 🔽 [Downhill Dedicated] 70% Knee Shock Absorption & Ligament Protection
- Patellar Locking & Tendon Decompression: Wrap Y-tape around kneecap edges from below, then apply horizontal I-tape with 60-70% high tension directly over tender patellar tendon.
- IT Band Friction Relief: Run vertical I-tape along outer thigh, then layer horizontal decompression tape directly over the lateral bone protrusion.
- Figure-8 Ankle Lock: Start above medial malleolus, pass under arch, and wrap around lateral malleolus to physically lock lateral ankle roll.
4. 💡 5 Golden Rules of Flawless Kinesio Taping
Round-Cut All Corners (Essential)
Always round the four corners with scissors to prevent friction with hiking pants and socks.
0% Tension on the First & Last 3cm
Never stretch the anchor ends; stretching ends pulls skin excessively, causing blisters and irritation.
Apply 30-60 Minutes Before Hiking
The heat-activated acrylic adhesive requires body heat and 30+ minutes for maximum adhesion.
Wipe Away Oils and Sunscreen
Skin lotion and sweat reduce adhesion by over 80%. Clean skin with a dry towel or alcohol wipe first.
Peel Slowly Along Hair Direction
After hiking, peel tape slowly in the direction of hair growth while gently pressing skin.
Common Rookie Mistakes & Proven Solutions
Smart Buyer's Guide: Knee Braces & Kinesiology Taping
- •❌ Tight tube-shaped elastic sleeves that choke blood circulation and weaken quads
- •❌ Cheap low-grade tapes that peel off after 10 minutes of sweating
Hikers experiencing early descent knee fatigue
Long-distance and steep terrain peak baggers
- ✓🔍 Easy wrap-around design (wear without taking off boots)
- ✓🔍 Built-in open patella silicone cushion for kneecap pressure relief
- ✓🔍 Sweat-wicking breathable neoprene or mesh fabric
Interactive Trail Safety Checklist
Tap each item before departing to verify readiness.
Generational Hiking Guide Series
Kids Trail Gamification & Scavenger Hunt
3 rules to turn early whining into joyful nature exploration
Couples Hiking Date & 10-Min Myth Guide
Pacing strategies, secret comfort gear, and scenic date peaks
4050 Spine Decompression & Fat Burn
Protecting lumbar discs while maximizing visceral fat loss
Hiking with Elderly Parents & Medical Kit
Barrier-free boardwalks, anti-shock poles, and medical safety